


Basic Payslip Editing
KashFlow Payroll lets you build the payslip on the screen by adding Items. Items are selected from a pre-defined list, the values of which can then be edited.
When you click on the “new item” button in either the payments column or the deductions column, you will see an item picker. Use the picker navigation to choose appropriate payslip items to add to either the Payments area or the Deductions area.
Item Picking & Editing
The item picker is a convenient, categorised list of payslip line items that covers most payroll scenarios. In addition to the main categories on the left of the picker, an item that has an arrow next to it indicates a sub-category with sub-items.
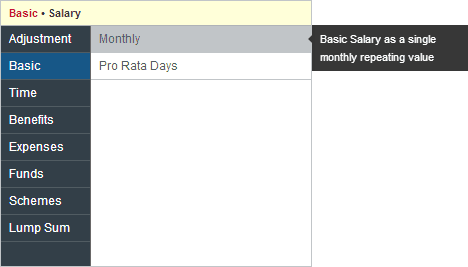
Pick an Item that best describes what you want to pay, in this example we’ve chosen Basic > Salary > Monthly Salary.
You can overtype the description to appear on the payslip, enter the number of Units and enter the Amount. Some Items may not let you change every field however. The square ‘End’ symbol means that the Item ends in this Period, and will not repeat on to the next Payslip.

To save you having to enter an Item every Period, you can set the Item to repeat automatically, for example Salary has a repeating symbol by default. You can click the ‘End’ and ‘Repeat’ symbol to toggle the setting.
Deleting Items
If you do not want an Item on the Payslip, simply press the Delete button. This also stops the Item from repeating into any future Periods.
If you delete an item you have not saved yet, it will immediately disappear from the payslip. If you delete an item you haven’t saved yet, it will be struck out, but still visible; it will also have an undo delete arrow next to it. When you save the payslip, the deleted item is removed and any related values are recalculated.
Automatic Items
KashFlow Payroll will automatically insert Items of the following types:
- Student Loan
- Statutory Sick Pay
- Statutory Maternity, Paternity and Adoption Pay
- Arrestment of Earnings Orders
To ensure that the Automatic Items are inserted correctly, please enter details in the relevant Employee area before Approving a Payslip.
Approving Payslips
When you are happy with the Payslip you can tick the Approve box and save. This prevents any changes to the Employee record, such as Tax Code, from affecting the Payslip. Prior to approving a payslip, changes elsewhere in KashFlow Payroll to employee records will automatically update any related payslip values. If you do make a change to employee information that you want reflected on the current payslip, visit the payslip after making the change and click the “Refresh Payslip” button.
Employee Rates
The Payslip screen shows the hourly, daily, weekly and monthly rates in effect at the time this Payslip was made. KashFlow Payroll sets the rates each time you enter an Item like ‘Salary’ or ‘Wage’ but you can override the rates at any time by clicking on them and entering different figures.
Year To date figures
KashFlow Payroll often displays a reporting pop-out box in the top right of the screen. Click the pop-out report on the payslip screen to display Year To Date figures.