AML- How to Network IRIS Anti Money Laundering (Desktop Version)
Article ID
aml-how-to-network-iris-anti-money-laundering-desktop-version
Article Name
AML- How to Network IRIS Anti Money Laundering (Desktop Version)
Created Date
31st August 2023
Problem
I have installed IRIS Anti Money Laundering but now I need to share this to my workstations, how do I do this?
Resolution
You will need to ensure you have installed IRIS Anti Money Laundering on your server, for instructions on this please click here. Once completed, follow the steps below.
Server Machine:
- Open File Explorer. Go to your AMLCP installation folder. Right-click on the AMLCP folder and choose Properties.

2. Go to the Security tab. Click Edit.
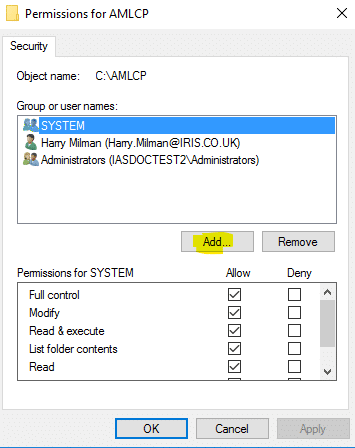
3. Click Add.
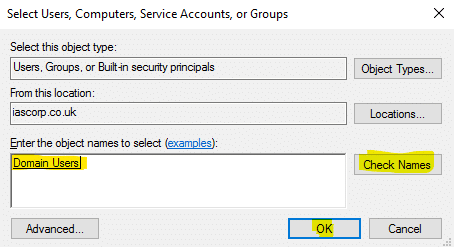
4. Enter a group name, for example Everyone or Domain Users. Then click Check Names, once selected click Ok.
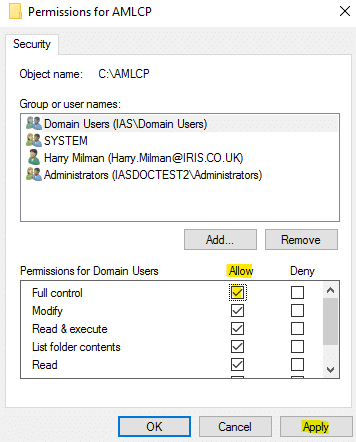
5. Make sure you highlight the group you have added and make sure it has Full Control – Allow box ticked. Once done click Apply and then click Ok.

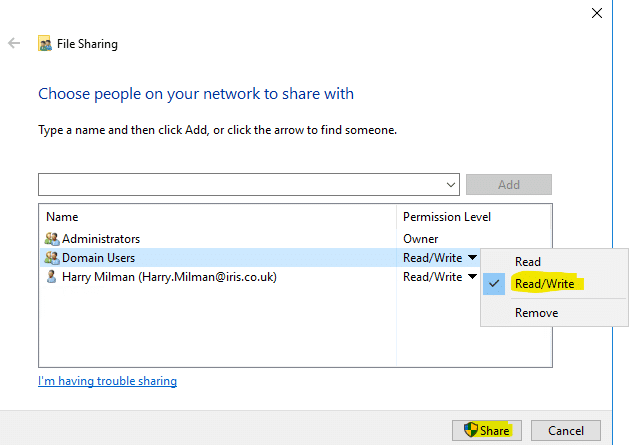
6. Go to the Sharing tab and click Share… select the group you are sharing it out to and make sure the read/write option is ticked before you click Share.
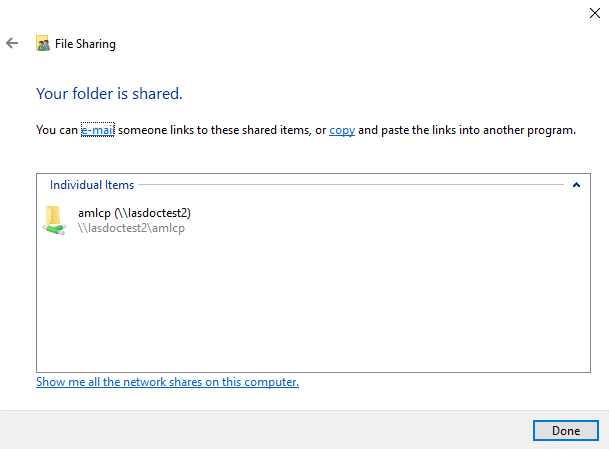
7. When completed, you should see a window informing you that the folder has been shared.
Client Machine:
On the client machine you will need to create a mapped drive to the network share that you have just created, please follow the steps below.
1. Open File Explorer and go to This PC
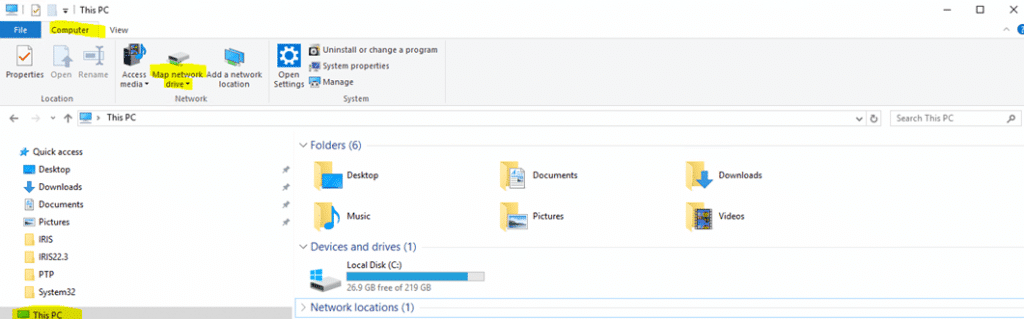
2. On the tab called “Computer” click on Map network drive.
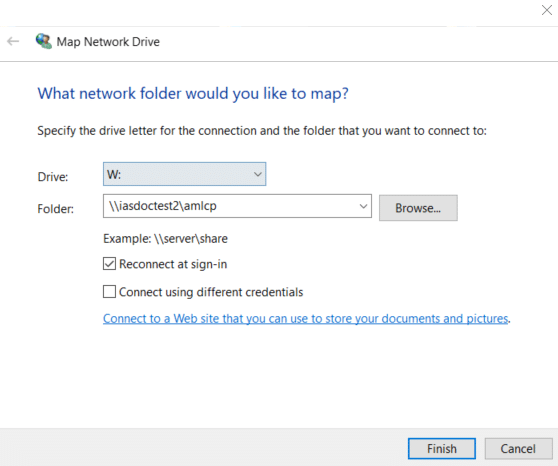
3. Assign a drive letter and in the Folder section add in the network share that you have just created as shown in the screenshot. Once completed, click Finish.
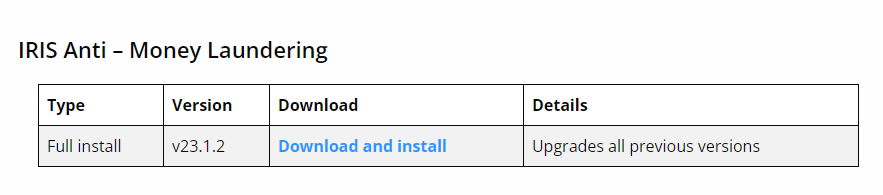
4. Download the IRIS Anti Money Laundering install from here.
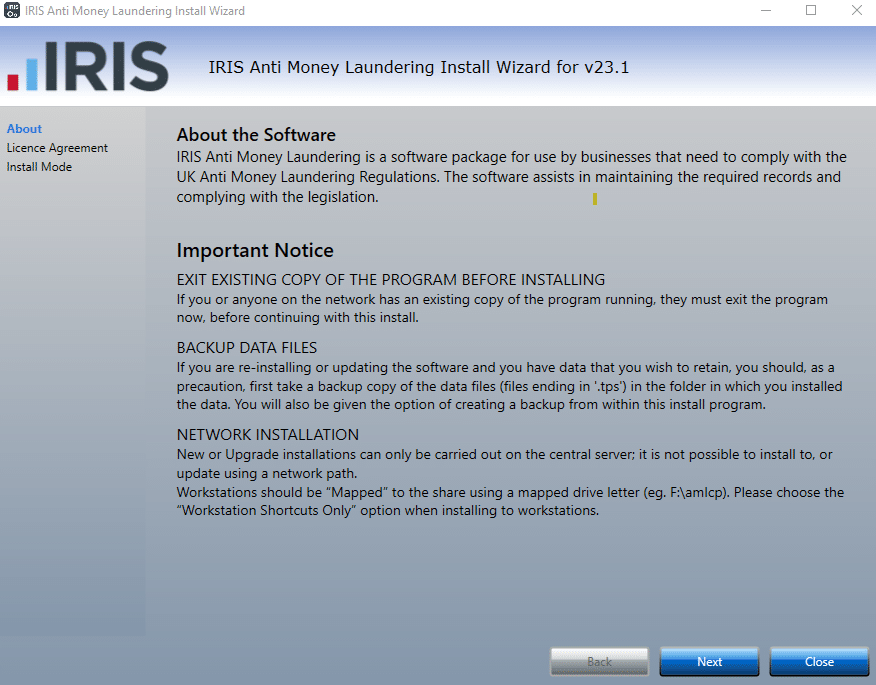
5. Run the installer and proceed through the Installer wizard and click Next.
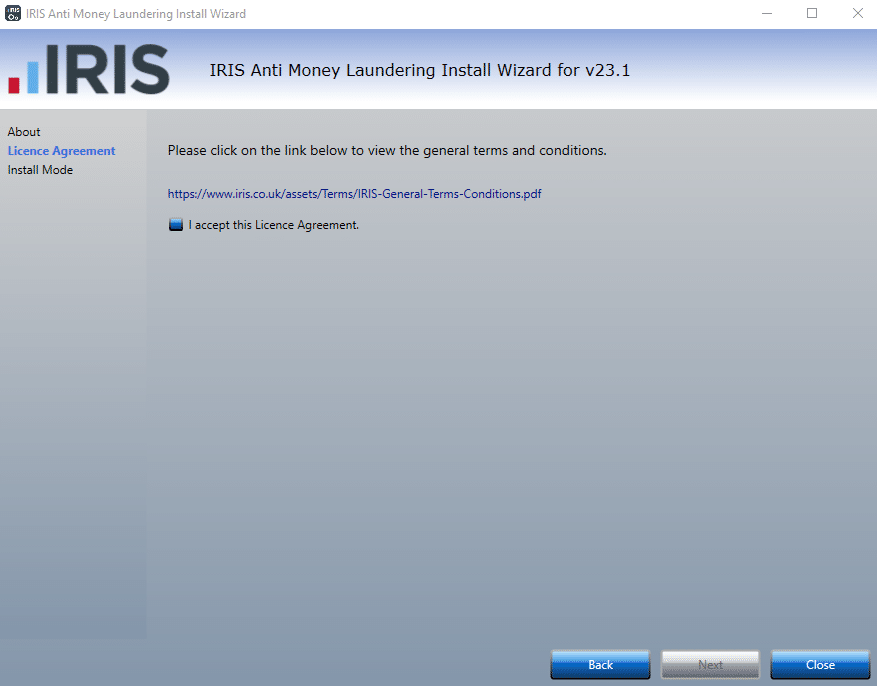
6. Accept the Licence Agreement and click Next.
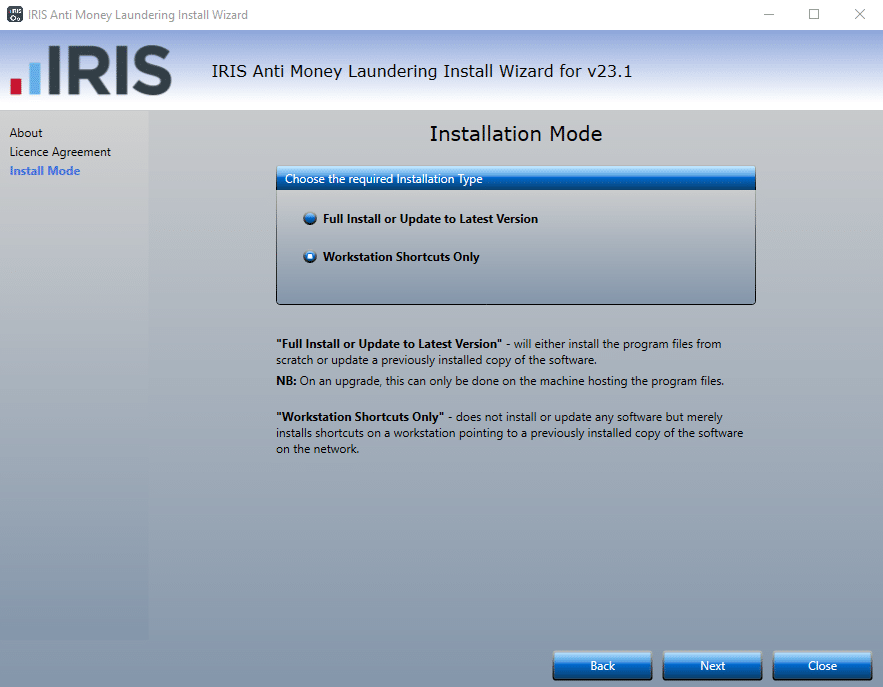
7. Tick Workstation Shortcuts Only and click Next.

8. Ensure all tests have passed and click Next.
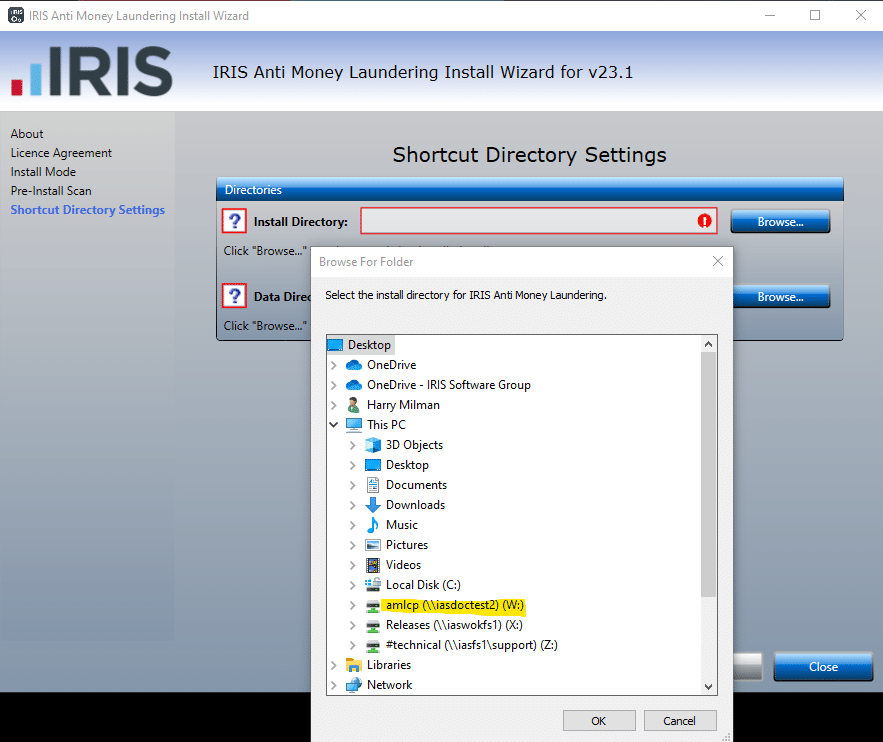
9. On Install Directory, click browse, then select your mapped drive you have created and click Ok.
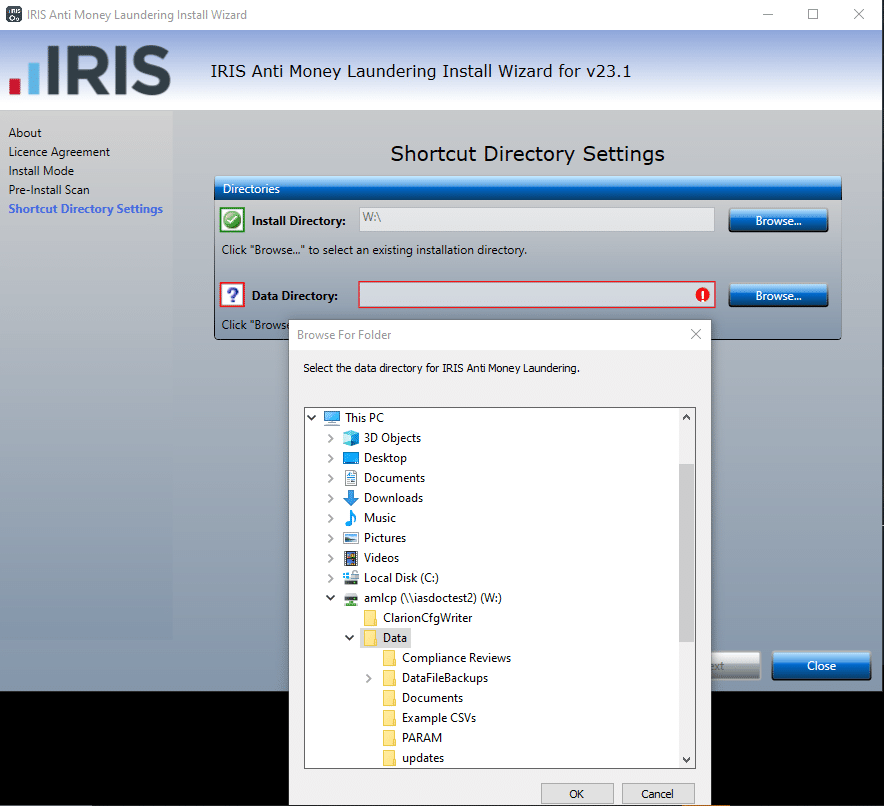
10. On Data Directory, click browse, expand your mapped drive you have created and select the folder called Data. Then click Ok.
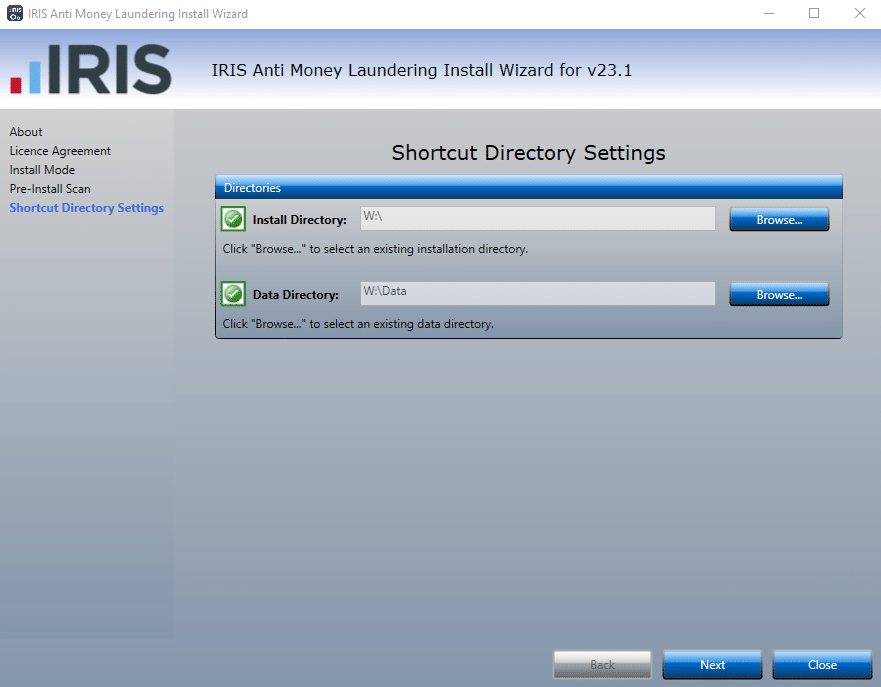
11. Once completed, both directories should be marked with a green tick, once confirmed click Next.
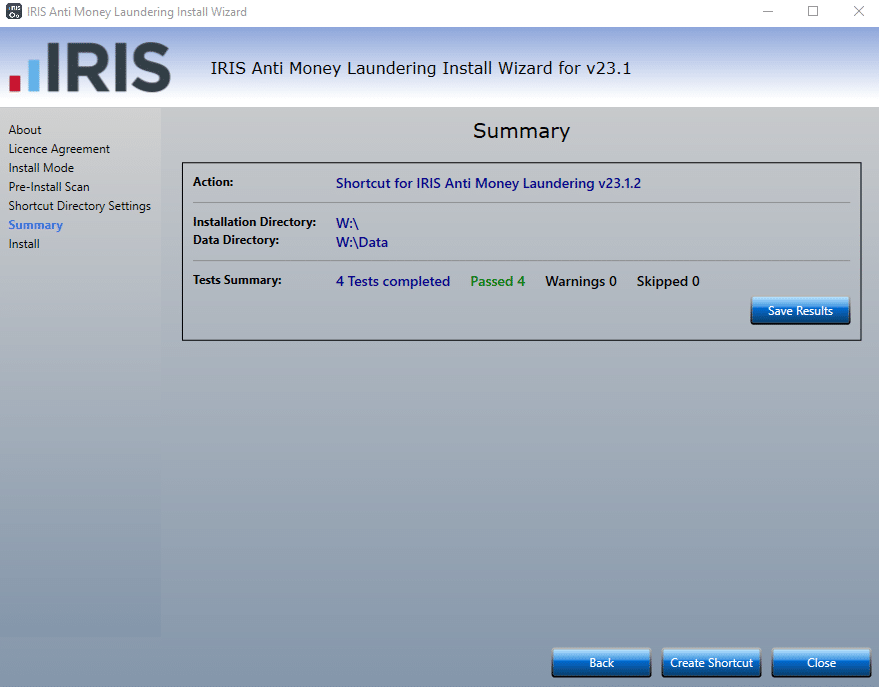
12. Review any warnings, if all has passed click Create Shortcut.

13. You should now have this icon on your desktop background.
We are sorry you did not find this KB article helpful. Please use the box below to let us know how we can improve it.