PAYE-Master – NEST Integration upload issues
Article ID
12254
Article Name
PAYE-Master – NEST Integration upload issues
Created Date
15th July 2021
Problem
We understand that customers are experiencing intermittent issues with the NEST integration in some of our payroll products.
(Using the software to upload the NEST data directly)
Resolution
We’ve undertaken testing on our systems to confirm that the payroll software is operating correctly. While NEST is unclear on the root cause of the issue currently it appears to be linked to a DNS error with customers using specific internet service providers.

We will continue to engage with NEST to get a greater understanding of the issue and share any further updates.
How do I send my pension information to NEST
As a workaround you can create the pension file and manually upload it to the NEST website using the below steps:
- Go to Pension | Create Pension File
- On the Select File to Create screen choose ‘Nest – Contribution Schedule’

- Click ‘Ok’
- On the Period for Contribution Schedule screen, choose the period under ‘Pay Period or enter the ‘From’ and ‘To’ dates in the ‘Date Range’
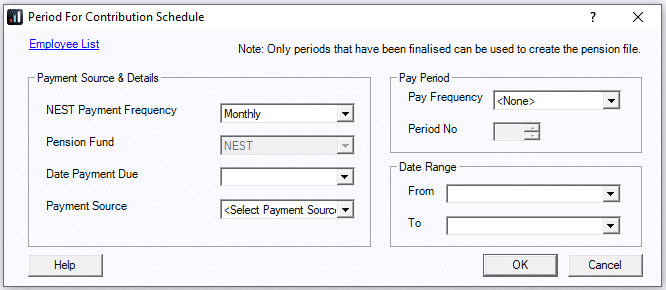
- If you have configured only one Payment Source then the field will be greyed out and disabled. If you have more than one Payment Source then choose the appropriate one in the dropdown field
- Enter the Date Payment Due to NEST in the field
- In the Nest Payment Frequency dropdown field, choose the frequency you will be paying NEST that you configured on NEST’s website
- Click ‘Next’
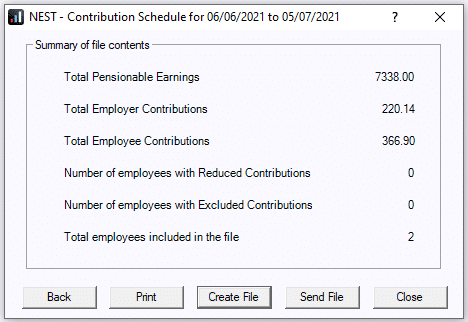
- You must inform NEST of any employees that didn’t have a pension contribution taken or made reduced contributions. You can change the ‘Reason for Reduced Employee Contributions’ by clicking the field and selecting another option.
- On the NEST – Contribution Schedule for… screen, click ‘Print’ to print a report of the employees that are included in the file
- Click ‘Create File’ to create the NEST – Contribution Schedule file
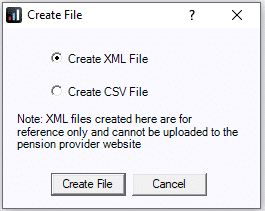
- Select ‘Create CSV File’ and click ‘Create File’
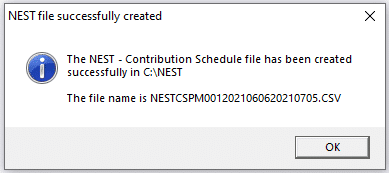
- Choose where you want to save the file
- A message will advise the location where the NEST output file has been created
Upload the file to the NEST website
Upload the NEST Contribution Schedule file to NEST:
- Login to the NEST website
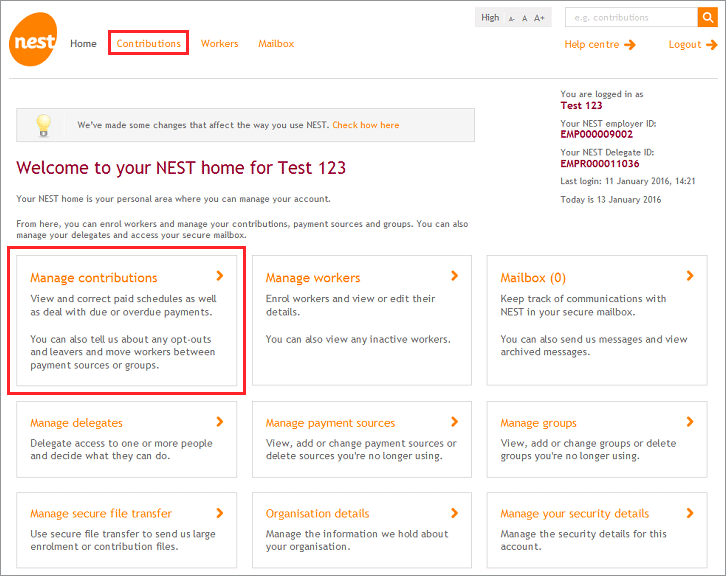
- Select ‘Manage Contributions’ from your NEST home page.

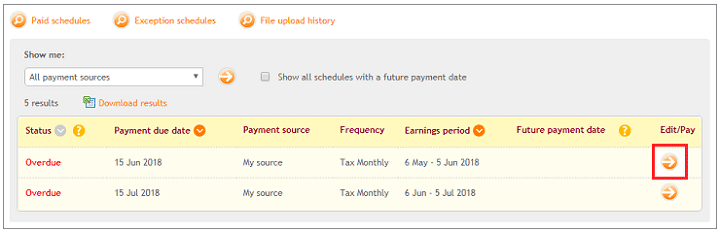
- Towards the bottom of the page you’ll see a list of unpaid contribution schedules, select the corresponding arrow under the heading ‘Edit/Pay’ to select the schedule

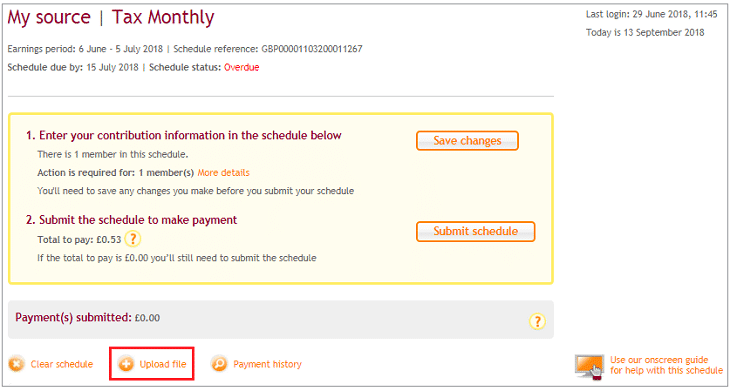
- Select ‘Upload File’

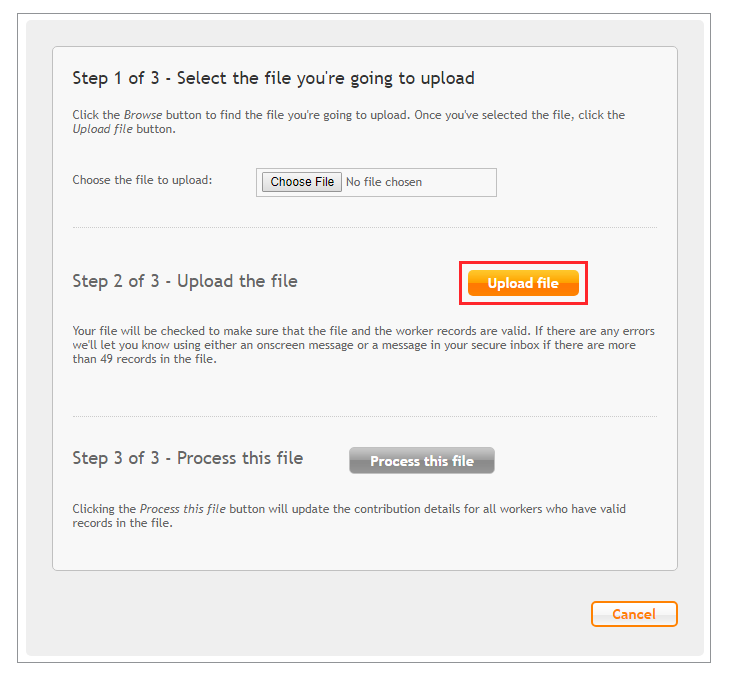
- Click ‘Choose File’ to search for the file. When you’ve found the file click ‘Upload File’

- NEST will then check the file and validate it, if there are any errors these will need to be corrected and the file re-submitted
We are sorry you did not find this KB article helpful. Please use the box below to let us know how we can improve it.