How to Import Receipts via CSV in IRIS Fees
Article ID
how-to-import-receipts-via-csv-in-iris-fees
Article Name
How to Import Receipts via CSV in IRIS Fees
Created Date
23rd March 2020
Problem
Resolution
Importing Receipts via CSV is a much more efficient way of posting receipts in bulk into a clients account. In order to do this the following steps must be followed:
- Open IRIS Fees|Posting|Import Receipts via CSV|Choose the period you would like to post into and press OK.
- Click on the Template button in the bottom left corner of the screen.
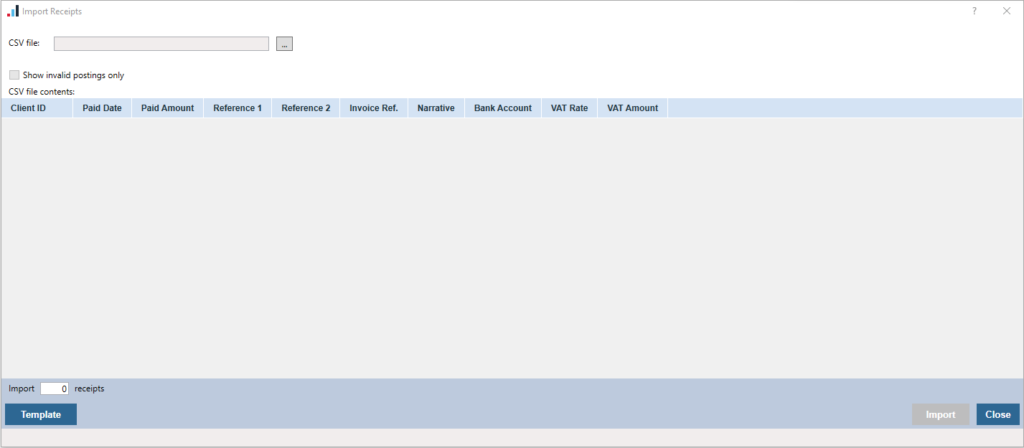
- Within the Template you are able to enter as may entries as possible following the below format.

- Once the information has been entered on the CSV File this will then need to be saved and closed.
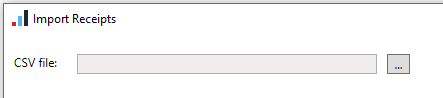
- You will then need to re-open Fees|Posting|Import Receipts via CSV and choose the option at the top to select the CSV file.
- Once the file has been selected it will show as below for all of the entries.

- You will then need to press Import. This will automatically post the receipt to the client account. To check the receipt has been posted successfully Open Fees|Enquiries|Account Details|Enter the Client ID|Search for the receipt by referencing the paid date or amount.
Once the Receipts have been imported you will need to match these so they no longer show outstanding on the clients account. Please click HERE for further information.
We are sorry you did not find this KB article helpful. Please use the box below to let us know how we can improve it.